Configuring MinIO for OpenID Connect Based Single Sign On
MinIO is a high-performance S3 compatible object storage system commonly used for storing files and binary data for cloud native, machine learning, and Big Data applications. Because MinIO is basically an enormous hard drive, making sure that it is properly secured and that only authorized users are able to access it is very important.
Technologies such as Single Sign On (SSO), Active Directory, and LDAP can be used to centrally manage users and provide better control over who can access business critical systems. MinIO supports using OpenID Connect (OIDC) -- a popular SSO system available in Identity Provider (IdP) systems such as Okta, Keycloak, Google SSO, Facebook Login, and Oak-Tree Acorn -- which can be used to manage authentication. In this article, we'll look at how to enable SSO in MinIO using Oak-Tree Acorn for an IDP.
Here's the procedure we need to implement:
- Create an RSA key that will be used by Acorn for securely signing JSON web tokens (JWT). JWTs are used in the OIDC workflow to securely pass messages back and forth between MinIO and Acorn.
- Enable OIDC within Acorn and provide the RSA key to use for signing.
- Configure MinIO to make use of Acorn as an OIDC provider.
Step 1: Create RSA Key and Enable OIDC Within Acorn
Acorn supports three different OIDC workflows: authorization code flow, implicit flow, and hybrid flow. All three utilize cryptographically signed JWTs to let client applications (such as MinIO) access information about a user. OIDC is not enabled by default when Acorn is deployed as it requires a signing key and additional configuration. In this step, we will:
- generate an RSA based signing key
- (optional) create YAML manifests to deploy the key as a secret to Kubernetes
- add the needed options to the Acorn site configuration to enable OIDC auto-discovery
- (optional) add the markup needed by Kubernetes in order to mount the key as a file in a deployment of Acorn
Generate RSA Key
While Acorn supports two different signing algorithms for generating JWTs (HMAC-SHA and RSA), MinIO requires the use of RSA (which uses a public key and a private key). RSA private keys can be generated using the OpenSSL command line tool. openssl is normally installed on Linux and other Unix systems including Mac OS X.
openssl genrsa -out acorn-oidc.key 4096
The command in the listing above will generate a 4096-bit RSA key. The contents of the this file must be kept secret and should not be committed to version control. It is used for generating the signatures that verify JWTs from Acorn and if compromised would allow an attacker to forge tokens.
(Kubernetes) Deploy RSA Key as a Secret
When deploying the Acorn instance to Kubernetes, a Kubernetes secret can be used to store the RSA key generated in the previous step. Secrets are objects that store sensitive information in Kubernetes such as a password, a token, or key. They allow sensitive and confidential data to be managed separately from application (Pod) instances which use them, which means there is less risk that the key might be exposed while creating, viewing, or modifying pods.
A secret can be used from within a Pod in one of three ways: a file that is mounted into a container, a container environment variable, or by Kubernetes as it is deploying a pod. For the RSA key, we will create an "opaque" secret (which can be used for arbitrary user-defined data) and then mount it into the container as a read-only volume.
The kubectl command below can be used to create a secret called acorn-sso-rsa-key within the acorn namespace and associates the contents of the RSA file created earlier (acorn-oidc.key).
kubectl create secret generic -n acorn acorn-sso-rsa-key \
    --from-file acorn-oidc.key=/path/to/acorn-oidc.key
The contents of the file have been associated with the acorn-oidc.key key inside of the secret. This information will be needed to mount the file in the Pod.
Add Configuration Options to Acorn Site Config
Acorn makes use of a special file called the "site config" for managing its options and configuration. Two keys control the settings for OpenID connect, both within the oAuth section of the file:
SITE_OAUTH_ENABLED: controls whether oAuth2.0 features for Acorn are enabledOIDC_RSA_PRIVATE_KEY: full path of the RSA private key which should be used for encrypting JWTs generated by Acorn
The listing below shows a sample oAuth section from the site config:
[oAuth]
SITE_OAUTH_ENABLED = True
OIDC_RSA_PRIVATE_KEY = '/srv/www/acorn/config/sso/acorn-oidc.key'
(Kubernetes) Mount Secret as a File
To mount a secret as a file in a Pod:
- The pod (or deployment) definition needs to include a volume under the
.spec.volumeskey. The key entry should contain a.spec.volumes[].secret.secretNamefield which references the secret object. The name of the secret using thekubectlabove isacorn-sso-rsa-key. - Add a
.spec.containers[].volumeMounts[]to the pod (or deployment) manifest for each container that needs to reference the data stored in the secret. For each referenced secret, thevolumeMountentry should includereadOnly = trueandmountPathkeys. ThemountPathshould be to an unused directory where the secrets should appear. - When mounted, each key in a secret's data section becomes a filename under the
mountPath. The container run command and programs should look for files in that directory.
The manifest in the listing below shows the needed keys under the .spec.containers.volumes[] and .spec.containers[].volumeMounts:
# ...
spec:
  containers:
  - name: acorn
    volumeMounts:
    - name: acorn-sso-rsa
      mountPath: "/srv/www/acorn/config/sso/"
      readOnly: true
  # ...
  volumes:
  - name: acorn-sso-rsa
    secret:
      secretName: acorn-sso-rsa-key
Test Acorn OIDC Configuration
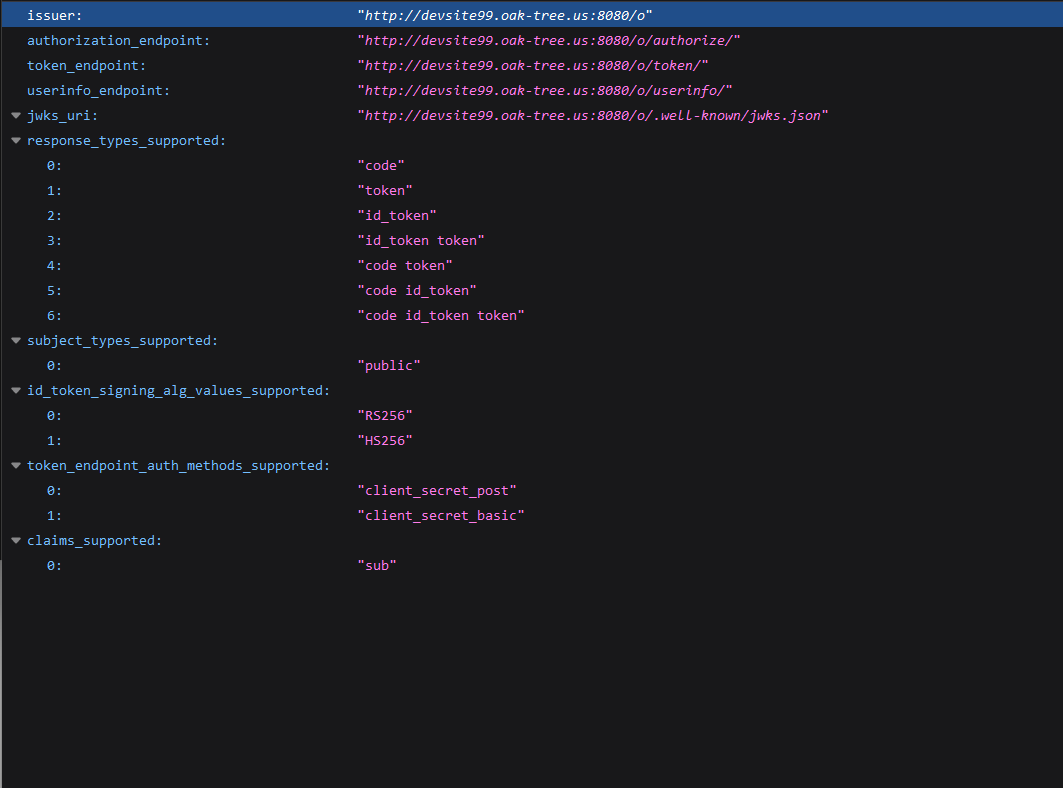
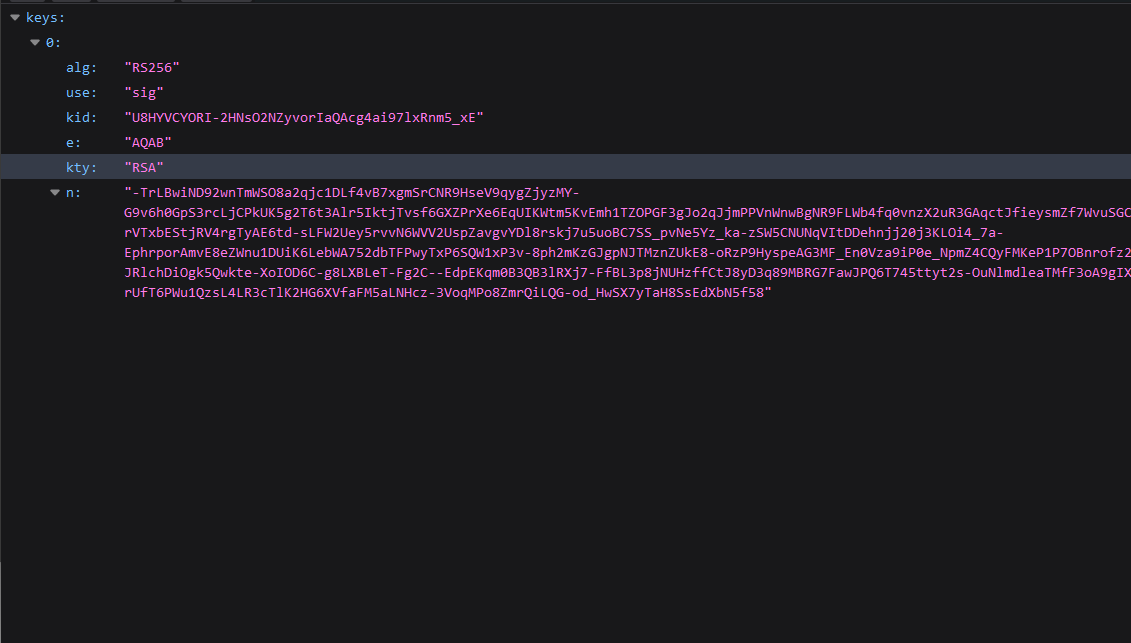
Once Acorn has been deployed with an RSA signing key, you can confirm that the configuration works by checking two endpoints:
{{ scheme }}://{{ acorn-web-url }}/o/.well-known/openid-configuration: provides configuration, endpoints, and claims needed by clients to use the OIDC services provided by Acorn{{ scheme }}://{{ acorn-web-url }}/o/.well-known/jwks.json: list of public keys that OIDC clients can use to verify and de-crypt JWT data from Acorn
In the URLs above, {{ scheme }} should be replaced with the connection scheme used by the Acorn instance (either http or https). {{ acorn-web-url }} is the fully qualified domain of the Acorn instance including the port number, for example: https://devsite99.oak-tree.us:8080.
Step 2: Configure MinIO SSO
After SSO has been enabled in Acorn, we need to configure MinIO to use Acorn as an IdP. This involves three steps:
- configure an OpenID "application" inside of Acorn that will be used by MinIO to initialize the login workflow
- add the details of the Acorn application to MinIO's "Identity OpenID" settings
- configure group permissions to allow for Acorn users to access MinIO buckets and resources
Create Acorn OpenID Application
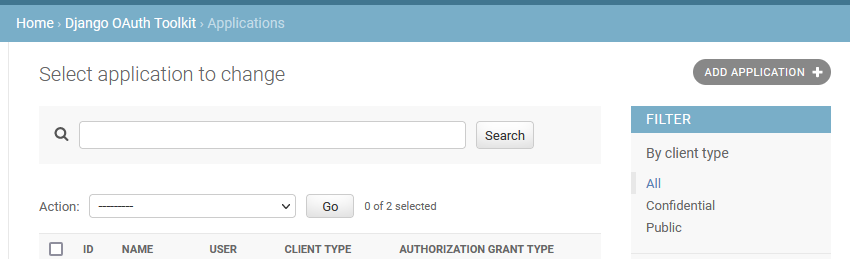
OpenID applications in Acorn are managed from the Django administration panel, accessible at /admin/django/oauth2_provider/application/. To create a new application, click on the "Add Application" button.
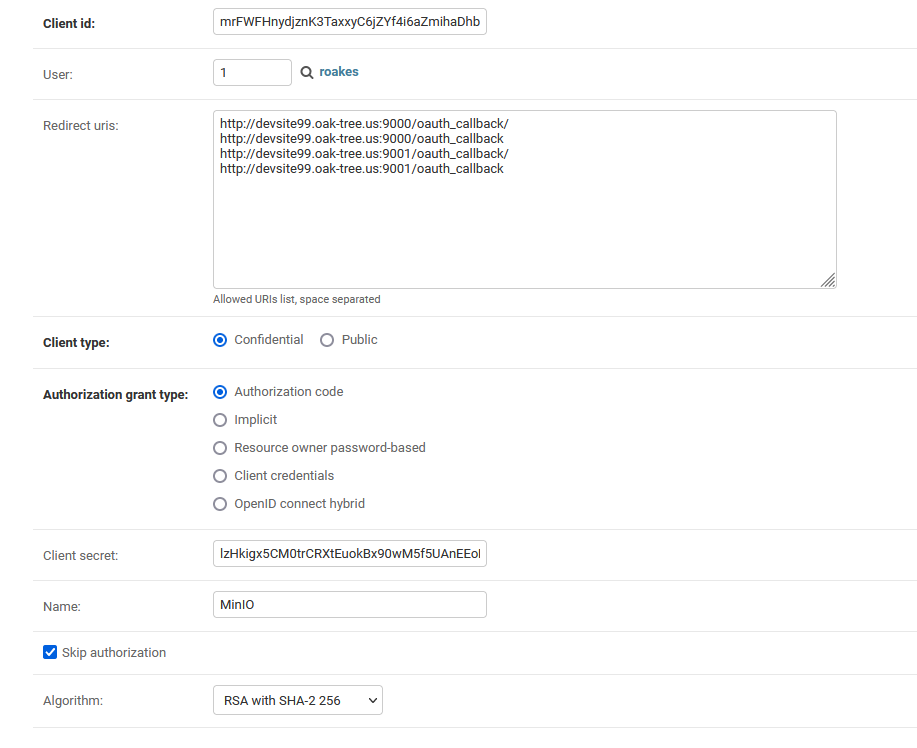
The OpenID application requires the following parameters:
- Client ID: serves as a unique identifier for the client application that is requesting user data. This value will be autogenerated when the page loads.
- Client secret: secondary identifier associated with the ID to authenticate requests made by the OpenID client. Like the client ID, this value will be auto-generated when the page loads.
- Client type: provides information on how MinIO will verify credentials issued by the server. For MinIO SSO, this value should be "Confidential".
- Authorization grant type: the workflow supported by the client. MinIO uses an "authorization code" workflow.
- Name: a human readable name to identify the application within Acorn.
- Skip authorization: if un-checked, Acorn will ask users to verify that they wish to provide users access to their data.
- Algorithm: the signing algorithm used to encrypt and verify JWTs created by Acorn and sent to MinIO. "RSA with SHA-2 256" should be selected.
- Redirect URIs: a white list of URLs to which the IdP will forward traffic. URLs must match exactly, including the scheme, port, and resource.
Add Acorn OpenID Applications to MinIO
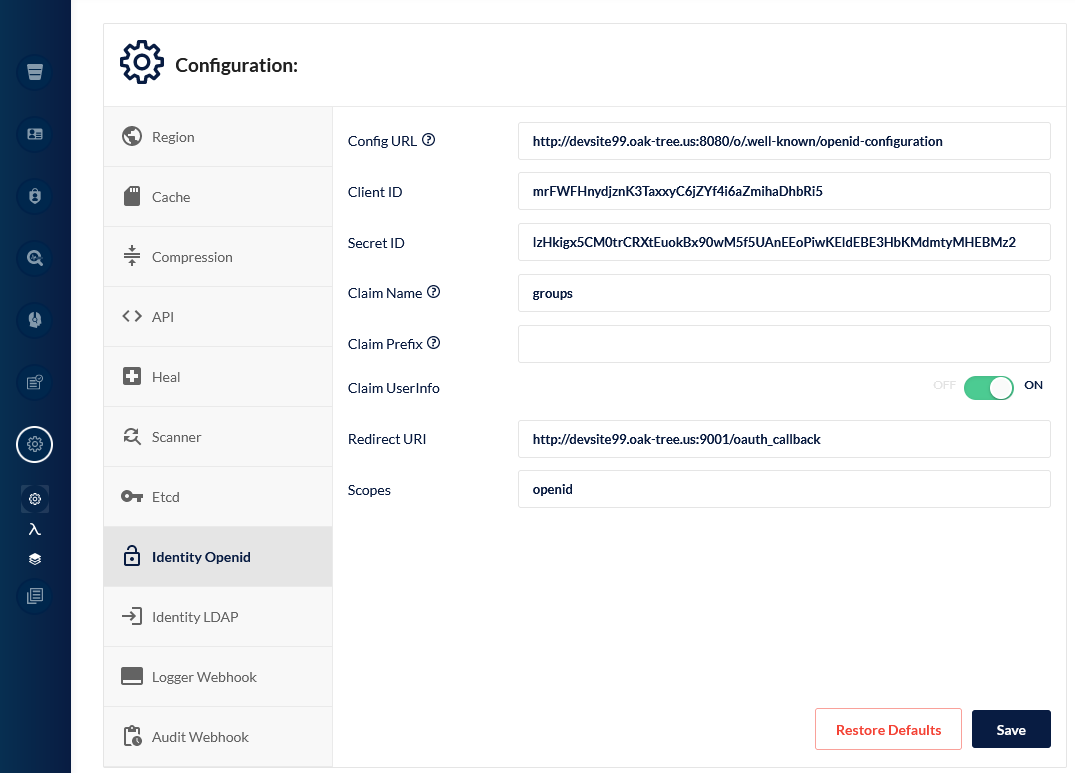
Once you have configured the settings in Acorn, they need to be added to MinIO. OpenID SSO settings are available from the MinIO Console application (which can be accessed on port 9001). To load the "Identity OpenID" panel, click on the "Settings > Configuration" Icon in the sidebar and then select the "Identity OpenID" tab.
MinIO requires that you provide the following values:
- Config URL: this is the OpenID configuration endpoint of Acorn. It is available at
{{ scheme }}://{{ acorn-web-url }}/o/.well-known/openid-configuration. - Client ID: this is the client ID from the Acorn OpenID application.
- Secret ID: client secret from the Acorn application.
- Claim Name: name of the property that MinIO should use to determine the permissions of the user. For Acorn, it should be set to
groups. - Redirect URI: URL which used by Acorn to redirect successfully authenticated users back to MinIO. It should be
{{ scheme }}://{{ minio-console-url }}/oauth_callback. The URL must match one of the redirect URLs that you provided in the previous step. - Scopes: the set of OpenID scopes required by MinIO. For Acorn, this value should be set to
openid.
After adding the application values, click the "Save" button. You will then be prompted to restart the server.
Create Acorn Groups to Manage Access to Resources
Once the OpenID application settings are configured in MinIO, it will be possible to authenticate to the server. For authenticated users to be able to access resources (such as buckets or the console), however, they must be associated with a "policy."
Policies are part of MinIO's access control system and are used to grant access to buckets, files, and other resources. They consist of of a set of permissions written in Amazon's Identity and Access Management (IAM) Syntax. MinIO includes a number of built-in policies that can be used to assign access to a user:
consoleAdmin: grants access to the configuration of the MinIO instancereadonly: grants read-only permissions to all objectsreadwrite: grants read and write permissions for all buckets and objectsdiagnostics: grants permission to read diagnostic logswriteonly: provides write-only permissions to buckets and objects, but prevents reading and listing of objects or buckets
If a user is not associated with a policy, they will be unable to log into the console and will see an error after authentication. Additional policies which provide more limited access to a bucket or set of objects can be created, but that is beyond the scope of this article.

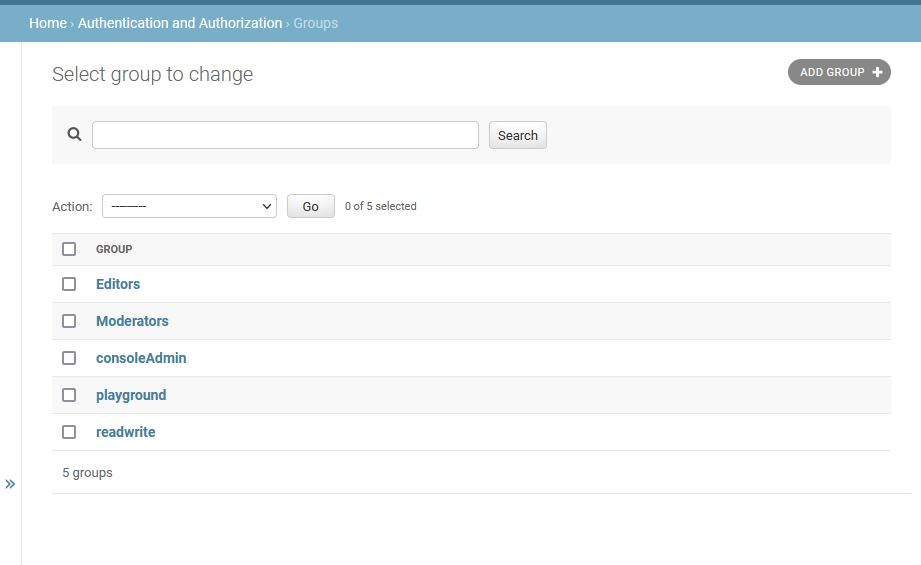
Policies for SSO users are assigned by adding them to a group in Acorn with the same name. Groups can be created through the Django admin "Authentication and Authorization" panel available at /admin/django/auth/group/.
To create a new group, click on the "Add Group" button. The group name needs to match a policy defined in MinIO exactly. The image below shows an Acorn instance that has groups defined for consoleAdmin and readwrite.
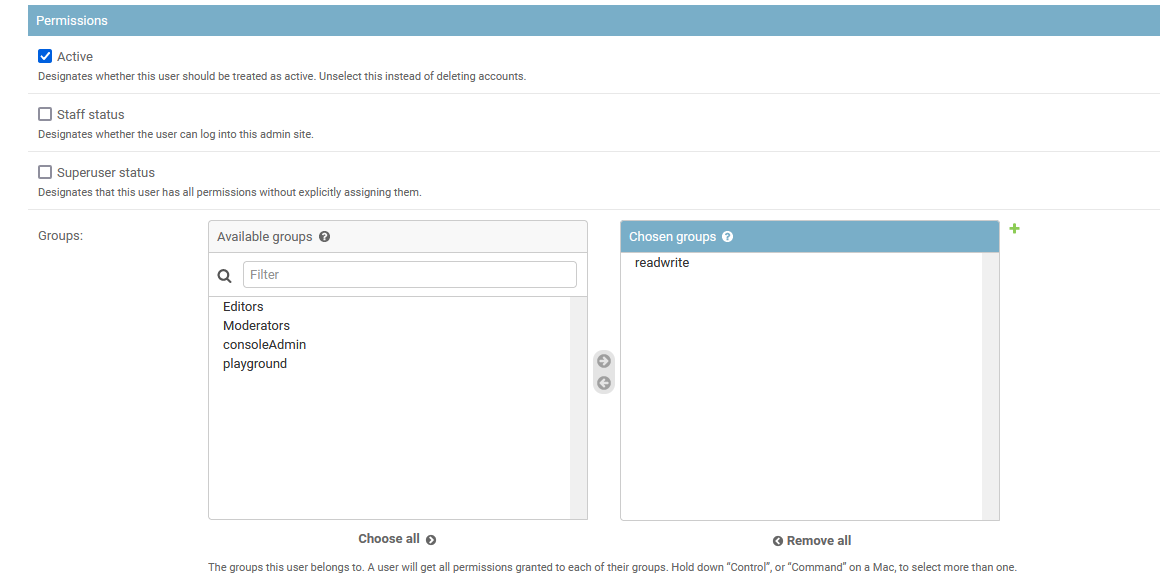
Once a group has been defined, it can be assigned to a user from the "Users" panel, accessible at /admin/django/auth/user/. Membership to a group is assigned under the "Permissions" section. A user may be a member of many groups as needed for their role. After groups have been assigned, click on the "Save" button.
Testing Access
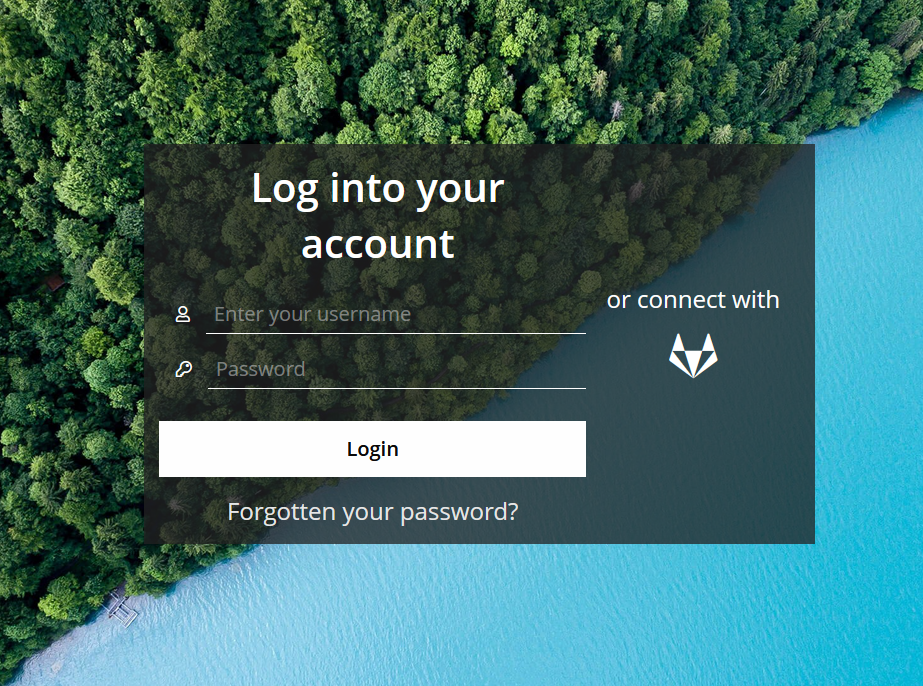
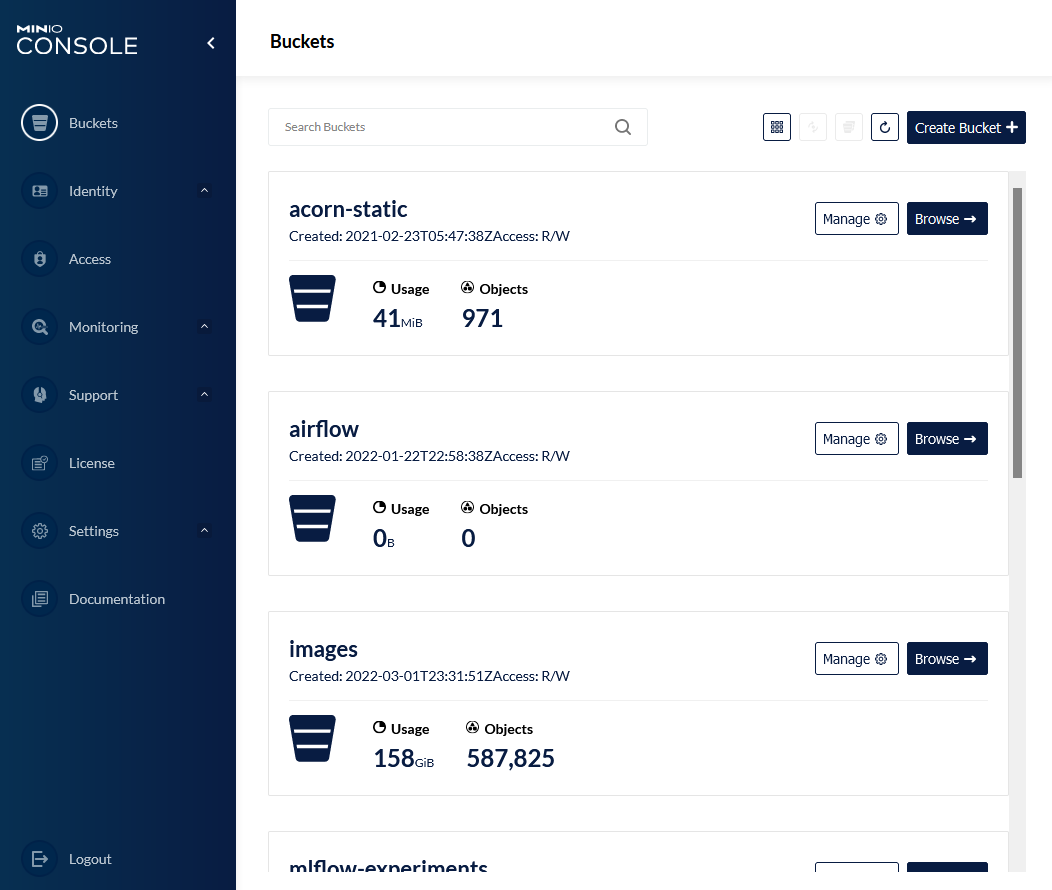
Once the identity options are set and groups created/assigned, the integration can be tested. To do so, navigate to the console application for MinIO. It should show a "Login With SSO" button. After clicking the button, you will be redirected to the Acorn login page to provide your credentials. Upon successful authentication, you will be redirected back to the MinIO console.

Comments
Loading
No results found